Some of the characters I did at nWave studios for the film The Queen’s Corgi.


Some of the characters I did at nWave studios for the film The Queen’s Corgi.

I created a simple boxing ring for the background and when I think about it, I may have spent more time than needed because of how blurry it is.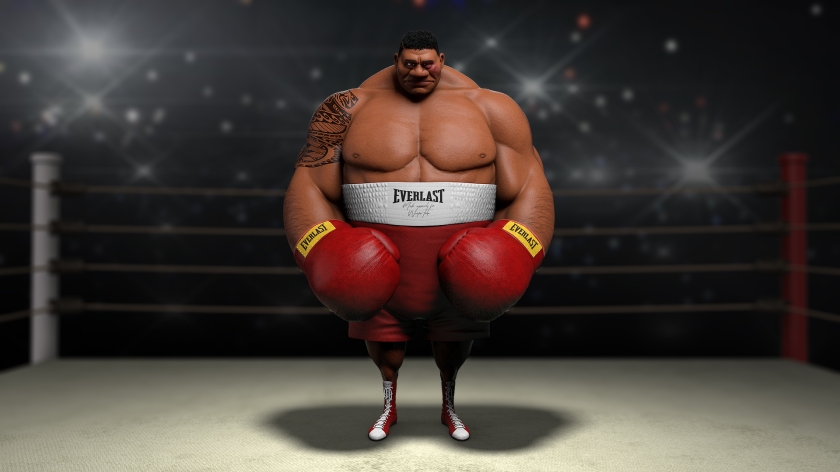
Zbrush 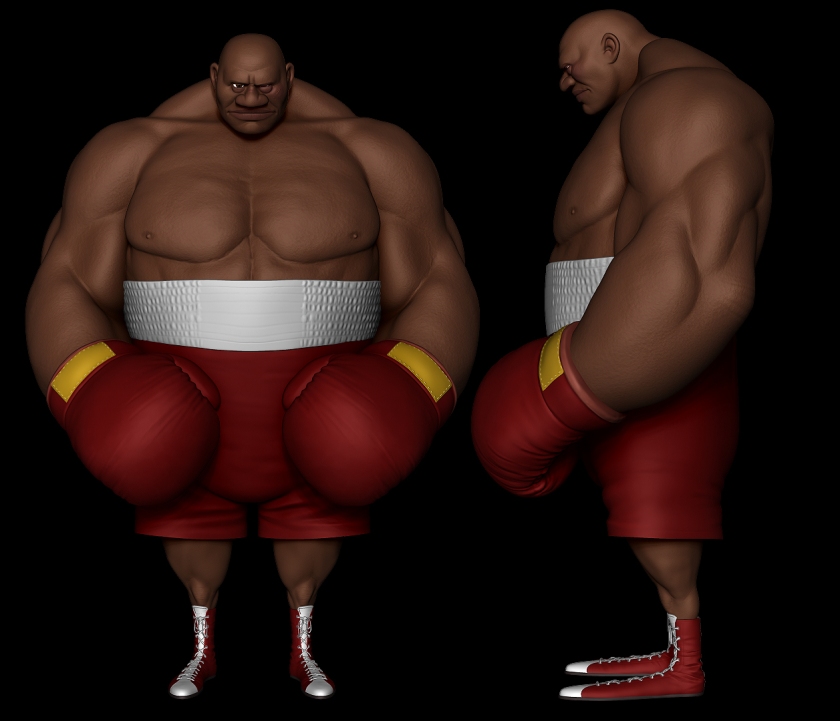
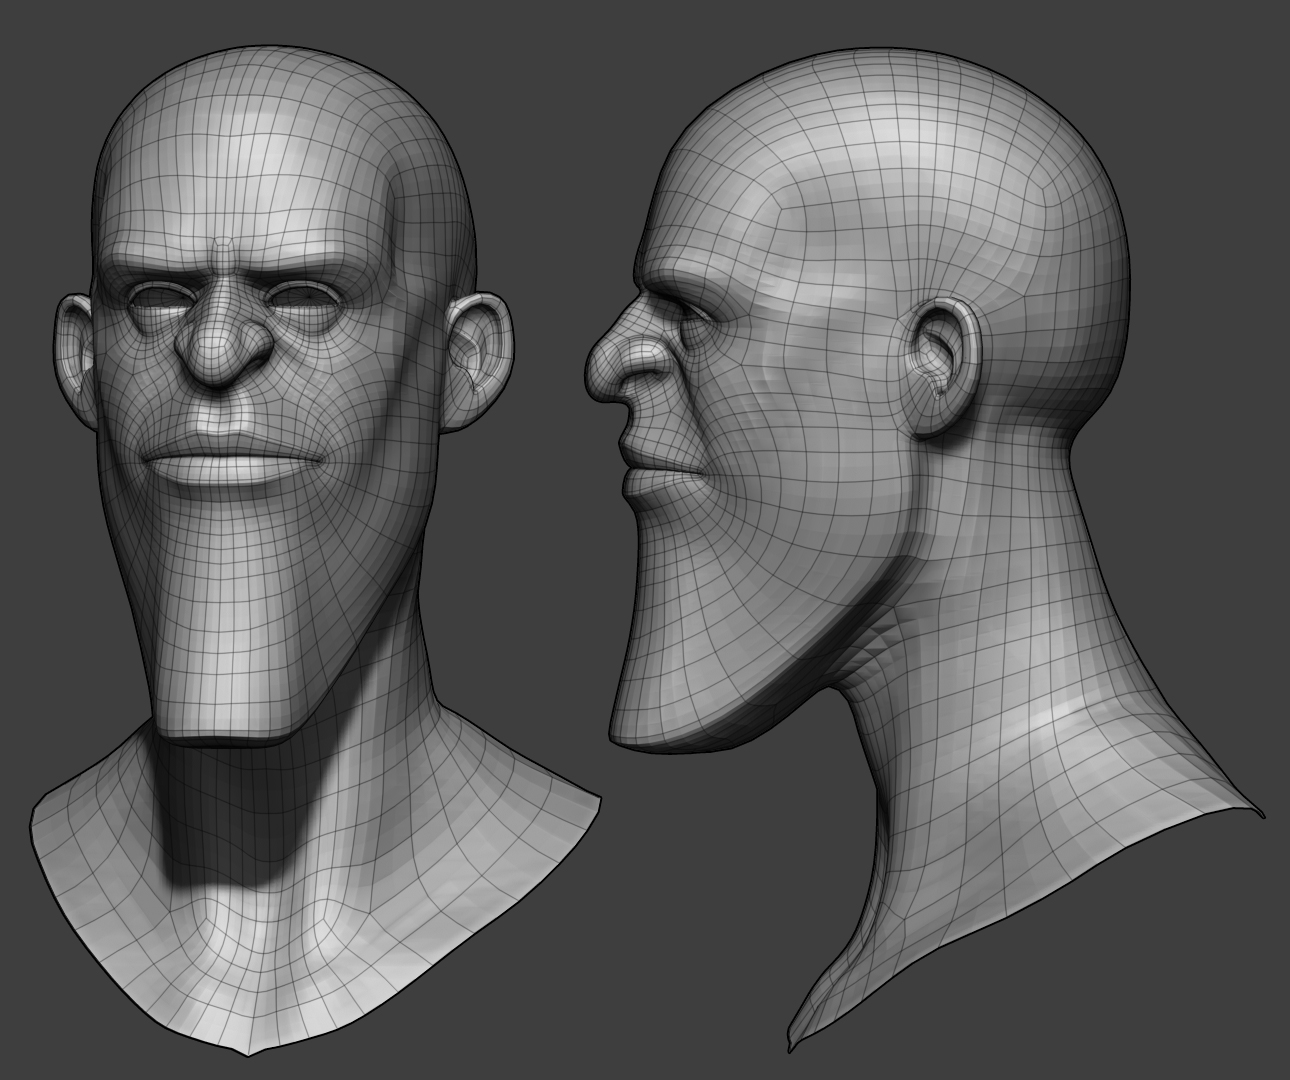
Zremeshed Head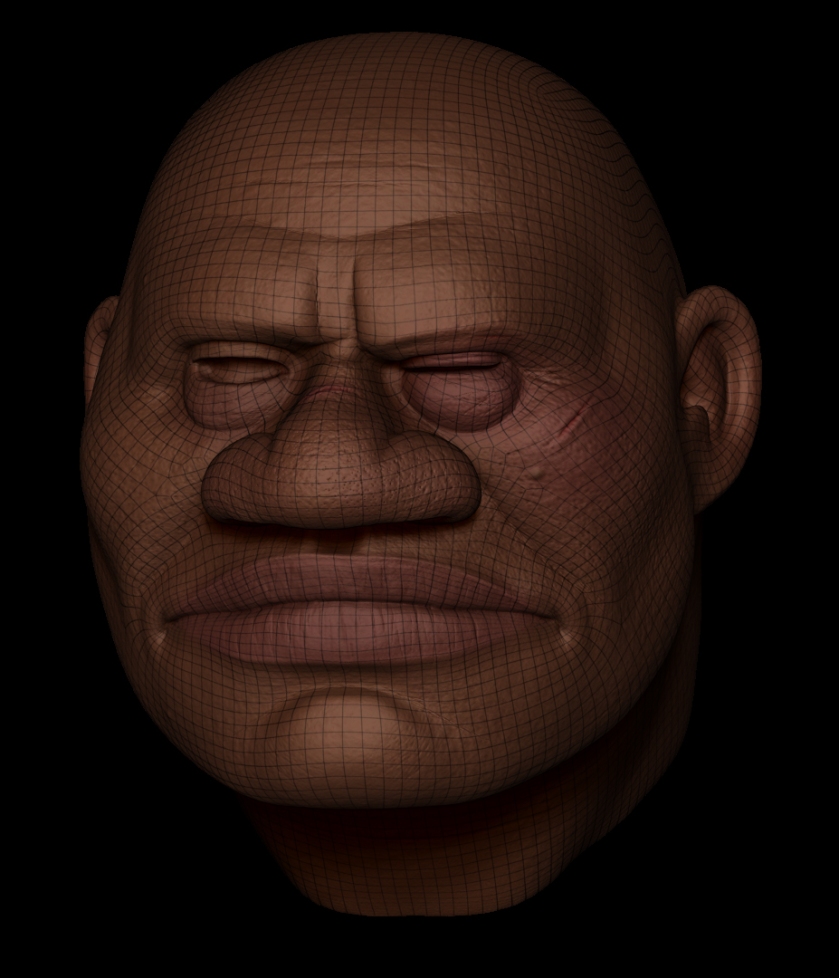

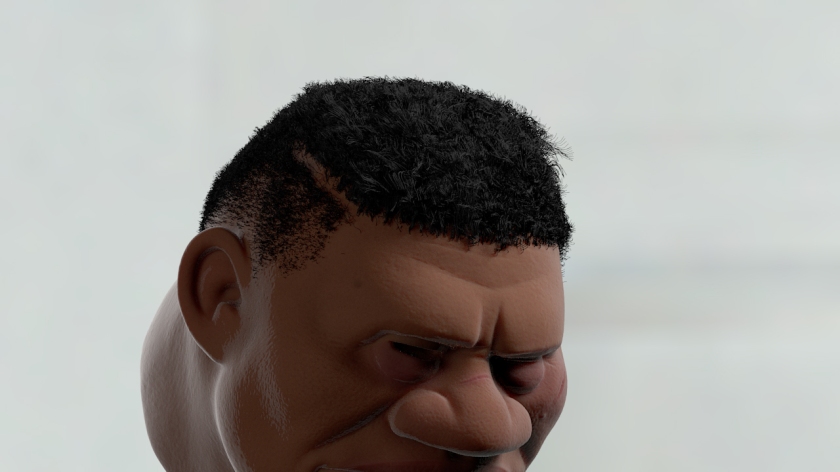
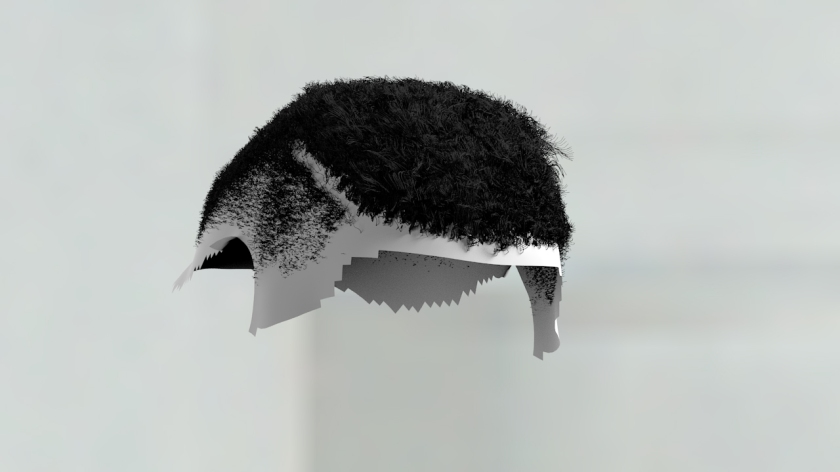
I’m reaching the final meters with this character. I polypainted the base for everything in ZBrush and then continued working the textures in Photoshop. So pretty simple process regarding that. I’m rather happy with how the hair is turning out. I’m using the standard Hair&Fur in 3ds Max so again, nothing fancy, I am rendering the hair through Vray so I’m using VrayHair material.
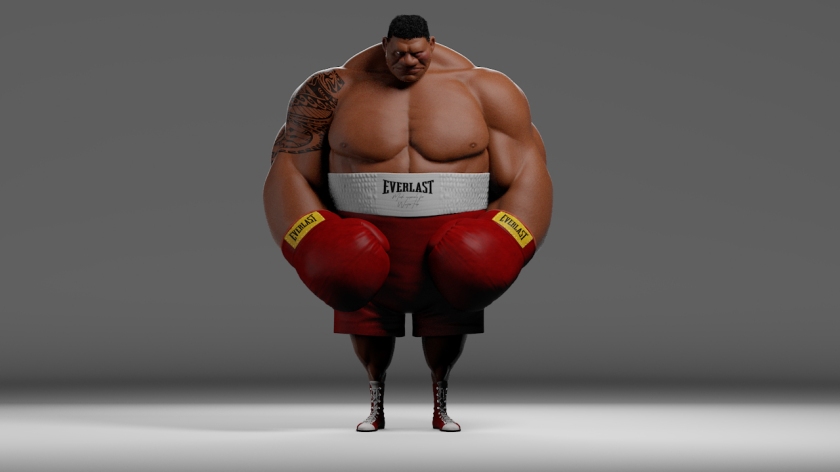
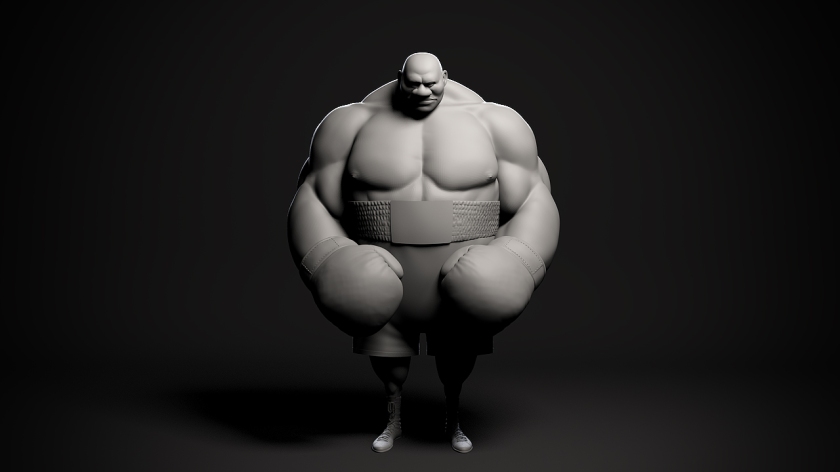
My next project, The Boxer, a concept by Wouter Tulp. I’ve finished the basic model in Zbrush and I’m thinking about just to Zremesh for final topology. I have already started the UV’s on the head and body so there is still a good amount left.
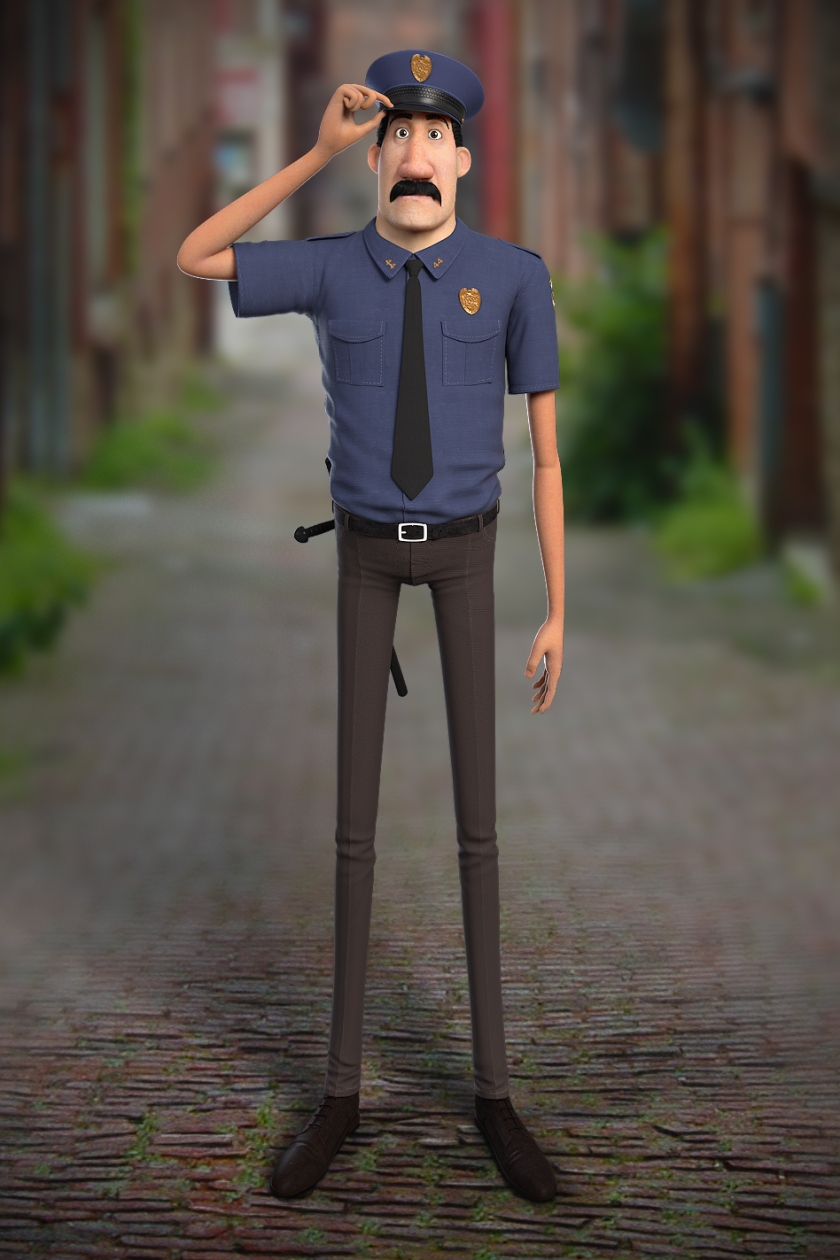
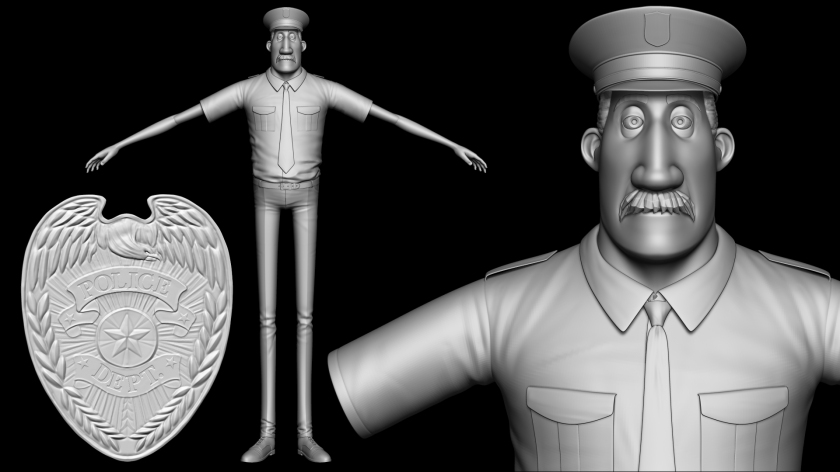
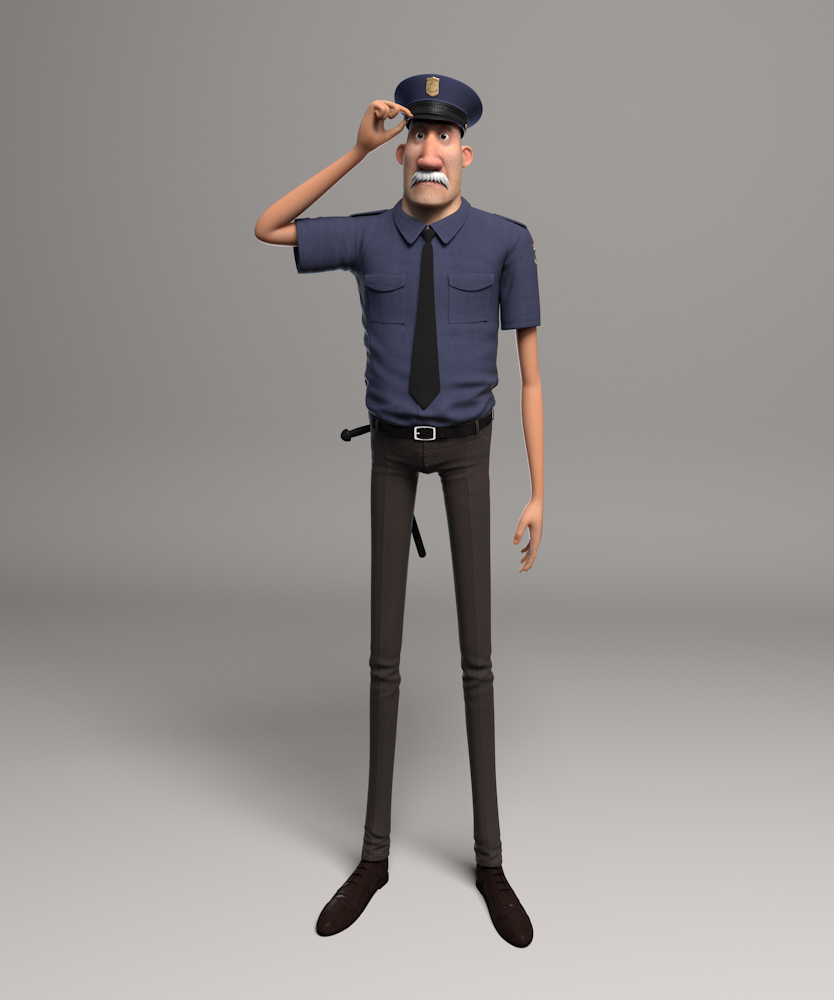
The policeman is finally finished, some other project got in the way which I had to finish in between but after that I finally was able to finish this character.
Sculpted the badge in Zbrush using a reference I found online.
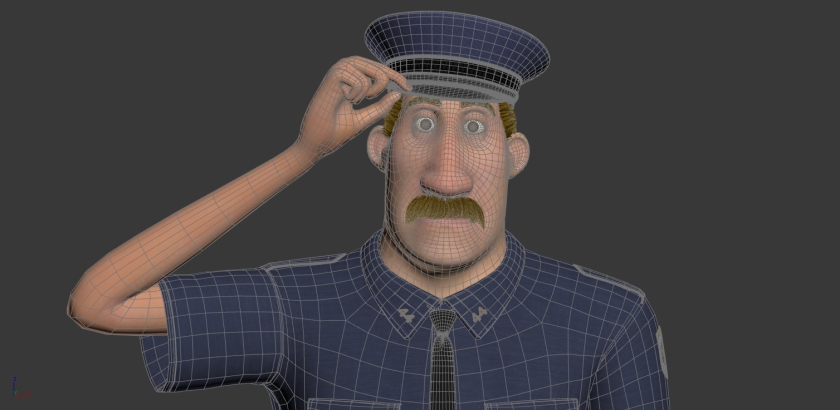
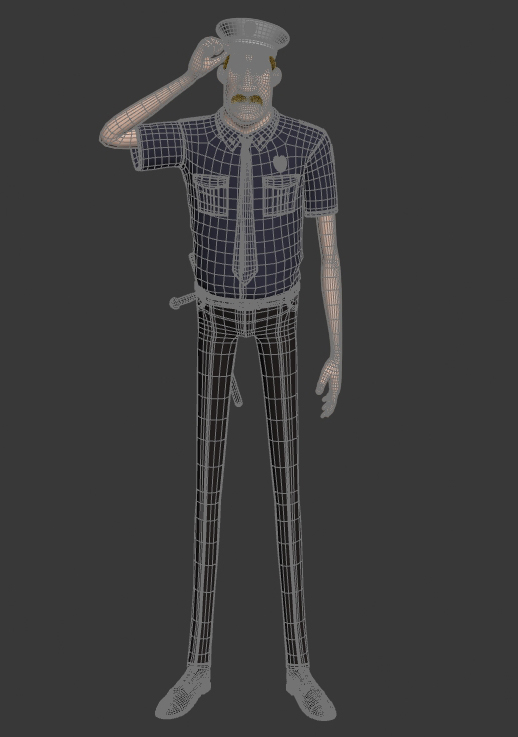
The textures are on the final stage. I have to fix some things here and there but the overall texture process is finally finished.
Next up is the hair and add small details to the character.

I’ve started the texturing process using a mixture of Mari and Photoshop. For all the skin I’m using Mari and the rest Photoshop.
I also posed the character to fit the concept, I used the Subtool Master plugin in Zbrush which is super fast and simple.
I’m really pleased of how the character is rendering out since this is straight out of Vray.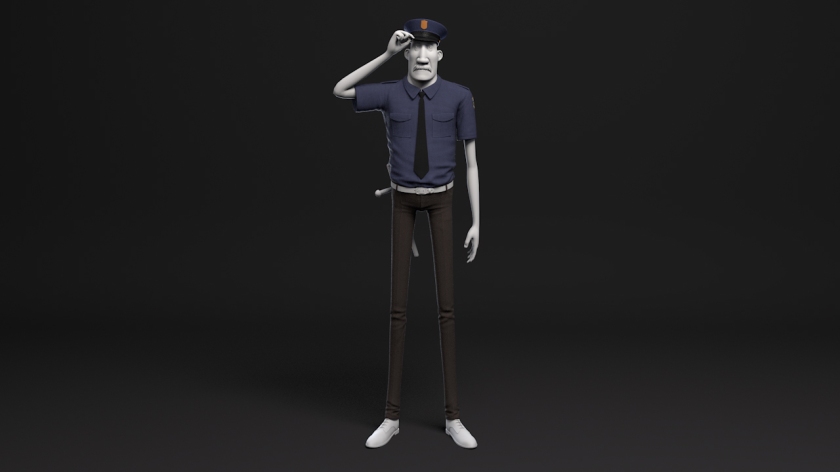

As it often happens when I’m modeling, I begin a project, work on it until I stop liking how it is turning out and start a new one.
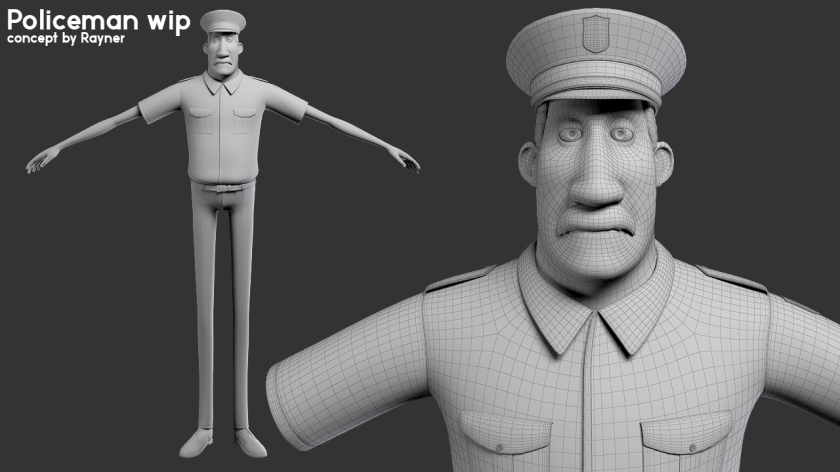
This character I started modeling roughly 2 years ago and in some curiosity opened the ZTool file couple of days ago. The character was created by an artist called Rayner Alencar (here’s the concept). The last time I worked on it I had finished the base mesh, finished retopologising the head, the body and the shirt. I did some tweaking to the topology of the shirt and ears, then created the rest of the outfit.
I’m planning to take the character into Mari and texture him there and will do my best to do the concept some justice. But I think I will make the character slightly less stylized as in the concept.

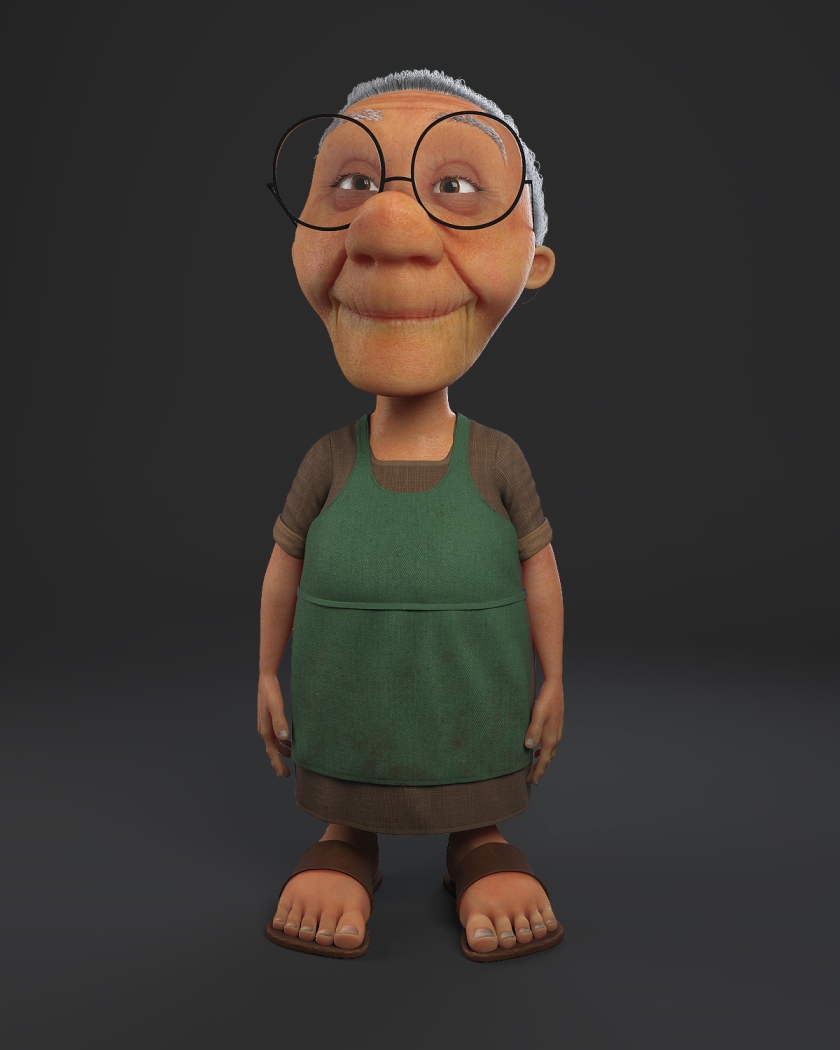
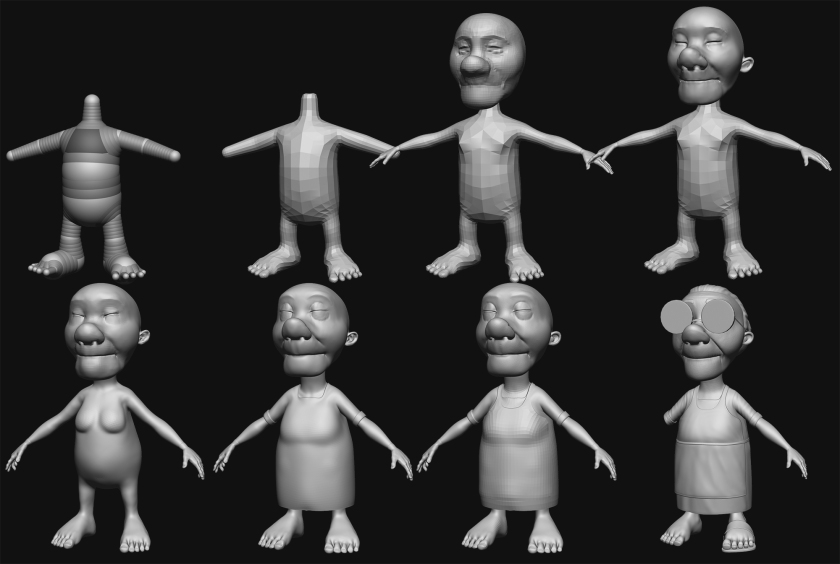
Finally a new post. I haven’t been able to work much in my personal art for some time. But I finally finished my next piece. It’s Mrs. Hasagawa from Lilo & Stitch. Really basic workflow. Starting with Zspheres and building it up to a certain level and throwing it to 3ds Max to retopo. Then I detail it in Zbrush. I decided I wanted to learn Mari so I used that for texturing. I will definitely use that again in the future, once I figured it out it’s rather really simple to use.

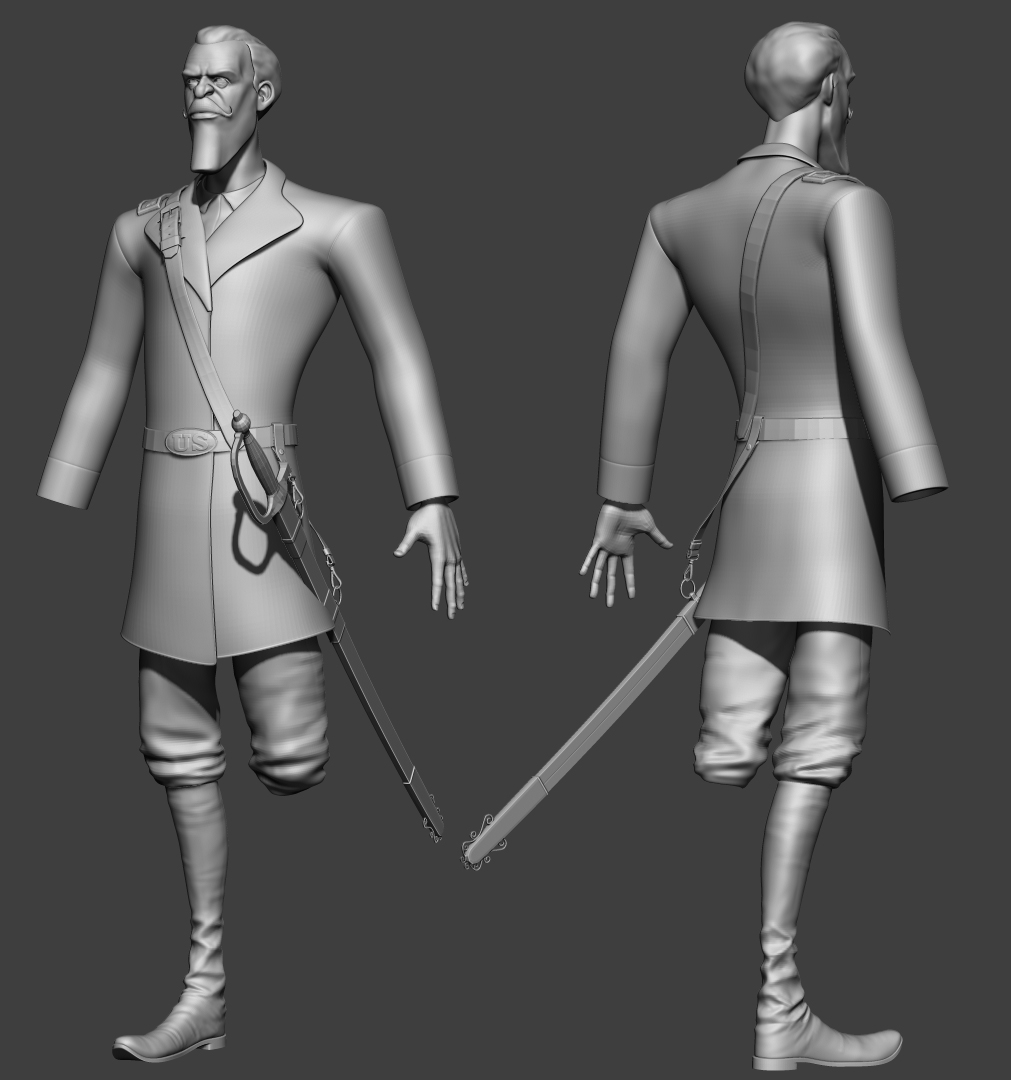
My progress so far. Not to much to say about this. The sword is simply polygonal model from reference as well as the clip that’s holding the sword to the belt. I’m thinking about redoing the pants and get the folds right, it’s not working for me like this, but I’m pleased with the boots as they are now.
